Shadowguard
The Shadowguard is a series of encounters found at Minax's fortress in the Valley of Eodon. A single player or party can attempt to defeat the challenge. Five rooms have special conditions to complete. Double-click the enchanting crystal ball in the grand hall to open the room's gump. It shows the current progress and allows the selection of encounters.
| |
Spoiler Warning The Shadowguard rooms are designed like puzzles. You may wish to figure out one or more rooms on your own. If you get stuck, you can always read further into this article. |
|---|
Contents
Rooms
Five themed rooms can be completed in any order. Red room names indicate they must be completed. Green room names indicate a room that has been completed. Players can repeat completed rooms as many times as they wish, but they won't provide additional rewards. All five rooms must be completed before the roof can be challenged.
To enter as a group, players must form a party. Only the party leader can use the crystal ball and select which encounter to go to. Room difficulty is increased with more monsters, the more party members there are.
Once a room has been entered, there is a 30-minute time limit to complete the room. This time limit does not apply to the roof. When the time limit is reached, all players in the room will be teleported back to the fortress near the crystal ball. Players will also be teleported out if their entire party dies. There is an ankh located next to the exit location that can be used to resurrect after a failed encounter. If, for any reason, a player wishes to exit a room without completing it, a contextual menu can be opened on the character and select 'Exit Shadowguard'.
The Bar
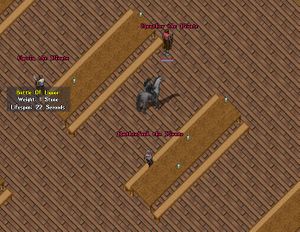
Players are transported into a bar with tables and ale left all over. Four waves of pirates will spawn. They have the same reflect damage as executioners. They can be fought normally, but there are bottles of liquor that spawn on the tables that can speed up the fight. Place a bottle in the backpack and double-click to throw it at the pirates. If a throw is successful, it does 300 damage. Four bottles will defeat a normal pirate. There is a chance of drinking from the bottle or having it break in the player's hand, causing damage. The bottles randomly respawn and have a lifespan of 60 seconds.
After the normal pirates are defeated, Shanty the Pirate will appear. While he is stronger and faster than the initial spawn, he does not reflect attacks. The bottles of ale can still be used on him.
Tactics
- Provoke the pirates and have other party members throw bottles.
- Pets or summons can work well to distract the pirates.
- Word of Death will not be reflected back on players, but only if the enemy health is 32% or less.
The Orchard
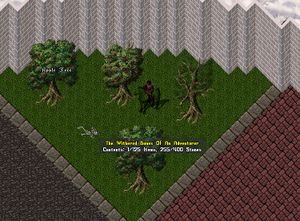
Players are transported into a courtyard with 16 Apple Trees. In the northern part of the area can be found the withered bones of an adventurer. On the corpse is a tattered book that reads:
- "I've finally found... this vile orchard is the key to Minax's enchantments!... days I've spent trapped within this tower, I dare not pick the fruit from the foliage for I know not the consequences may... Hunger is building... so hungry I must... Blech! Vile fruit!... What's This? For when I tossed this vile apple from whence it came a horrific beast appeared!... for I hope I can fight it..."
The goal is to destroy all the trees. To pick an apple, double-click the trunk of a tree. The apple will appear in your backpack with the name of a Virtue or a Dungeon. The apple has a lifespan of 30 seconds and must be thrown at the opposing alignment tree. Each tree is randomly assigned to represent a virtue or dungeon. Double-click the apple and throw it at a different tree, targeting the trunk. There are two possible outcomes:
- Success - Your throw releases powerful magics and destroys the tree! Both the tree you picked the apple from and the one it was thrown at are destroyed.
- Failure - Your throw seems to have summoned an ambush! A Vile Treefellow will appear for every person in the orchard. This also occurs if the apple expires and they have a lifespan of 30 seconds.
| A | B | C | D | E | F | G | H | |
|---|---|---|---|---|---|---|---|---|
| Virtue | Compassion | Honor | Honesty | Humility | Justice | Sacrifice | Spirituality | Valor |
| Vice | Despise | Shame | Deceit | Pride | Wrong | Covetous | Hythloth | Destard |
Tactics
- Bring a fruit-eating pet and, rather than throwing at a random tree, feed the pet the apple while noting down the type of tree. No treefolk will spawn.
- Use a scrap of paper to write down the type of apple each tree gives. This will result in knowing exactly where each opposing tree is very quickly.
- Do not attack the treefolk in any way (including summons). Doing so will drag the player to them repeatedly and will slow progress. They move slowly enough to avoid.
The Armory
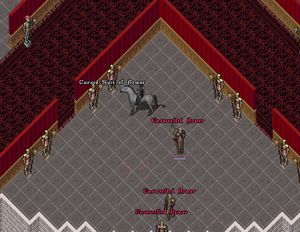
The rooms and halls here are lined with armored statues. After a few moments, Ensorcelled Armor warriors wielding halberds will begin appearing inside the rooms.
Most times when an armored warrior is defeated, it will drop a black bottle on the ground named a Corrupt Phylactery with a lifespan of 60 seconds. Pick up the bottle and take it to the center of the halls with the braziers that have special Purifying Flames. Double-click the bottle and target the flames.
This will create a Purified Phylactery in the backpack. Go up to one of the golden Cursed Suit of Armor statues, double-click the purified bottle, and target the statue, destroying it. It is easiest to target the statue base. Do this to all the golden statues to complete the encounter.
Tactics
- Have one person handle the statues while the rest kill the warriors.
- Have the party move to the next room once all the statues are destroyed in the current one.
The Fountain
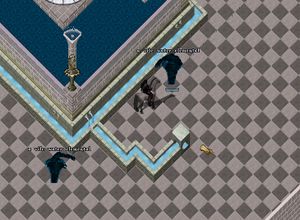
This grand fountain needs to be drained; it is overflowing and creating Vile Water Elementals. When killed, they leave behind Canal pieces of various shapes on the ground. The goal is to create a canal between the four gold Spigots on the fountain and the drains scattered throughout the room. Place them in such a way as to create a way for water to flow from the spigot to the drain.
Once the pathway has been completed, double-click on the spigot to start the water flow. If the path is not correct, then a Hurricane Elemental will spawn. Even worse, any parts of the canal that the water flowed through will be destroyed. Make sure there is a complete path for the water to follow before turning the spigot on.
Once all four spigots are emptying into drains, the fountain will run out of water, and the room will be completed.
![]()
![]()
![]()
![]()
![]()
![]()
![]()
Tactics
- More than one spigot can be diverted into the same drain.
- Short on straight pieces? Create a zig-zag pattern with corner pieces.
- While the elementals are weak, they can quickly overwhelm if they are not defeated quickly.
- Bring extra backpacks or pouches to organize all the canal pieces easily.
- Canal pieces will cover the entire floor and block movement. Pick them up as quickly as possible.
The Belfry
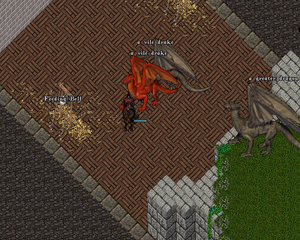
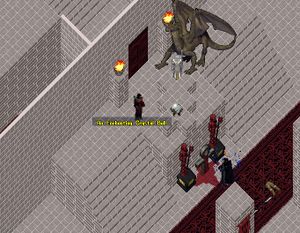
The first thing to be noticed is the Greater Dragon perched atop the center platform. Beware, as it will breathe fire and cast down spells. There are a pair of Feeding Bells on both the west and east ends of the area.
Double-clicking a Feeding Bell will summon Vile Drakes. When killed, there is a chance that a Magic Drake Wing can appear on their corpse. Using this item, a single player can be transported up to the platform to fight the Greater Dragon. The wing only has a lifespan of 1 minute, so it is not possible to stock up on them and have everyone go at the same time.
The Greater Dragon of this area is no ordinary Greater Dragon, as it has around 10,000 hit points. Periodically during the fight, the dragon will randomly push a target (player, pet, or summon) off the ledge. If this happens to a player, they will need to find another drake wing to use.
Tactics
- Melee warriors should be given the Magic Drake Wing first so they can begin their attack.
- Be sure to bring Dragon Slayer weapons and instruments.
- While tricky, Mystics and Mages can cast summons to the edge of the ledge. They can also discord and heal players from the ground.
- It is also possible for Tamers to guide their dragons up to the ledge without using a wing. The trick is to stop the dragon at the southeast corner, then run to the northwest corner and call for it several times. The dragon's natural flight ability will force it up to the ledge. Commanding it to stay and attack is crucial and sometimes difficult.
The Roof
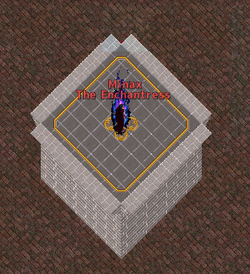
Once all five rooms have been completed, The Roof can be entered. The final encounter is a large open room with a small balcony in the center. The enchantress Minax stands here next to a corrupted time gate, which is used to summon her four lieutenants to battle. While she will taunt and target nearby players, she cannot be harmed and does not participate in the fight.
Upon arrival, each party member will see some taunting by Minax before she announces which lieutenant is summoned to fight first. The chosen order of the four is completely random, and all four must be killed for the encounter to be considered successful. Remember, there is no time limit during this final battle.
After the final lieutenant is defeated, Minax will curse you as the time gate explodes, vowing her revenge for another day. A gold explosion will happen, similar to a champ spawn - as well as a large amount of high-level items that drop on the fourth boss' corpse. There is a five-minute timer for loot to be collected before being teleported off the roof.[1]
The legends
The four lieutenants or 'legends' to defeat are:
- Juo'nar the Lich
- Virtuebane
- Ozymandias the Lord of Castle Barataria
- Anon the Mage
Tactics
- A group of tamers can finish the entire fight rather quickly, as the legends do not summon helpers on greater dragons. This tactic only works if you do not cast any offensive spells (including summons) or attack them directly.
- While Virtuebane cannot be discorded, the other three can.
- Do not attack Anon when he turns into an elemental, as he uses this form to rapidly heal.
- Avoid fighting near Minax, as her targeting will sometimes draw the attention of pets and summons.
Rewards
A player has the chance to receive one of the following artifacts in their backpack upon the death of the final legend of the roof encounter.
Screenshots
Fortress Lobby in the Enhanced Client
The grand entrance to Minax's new castle
